
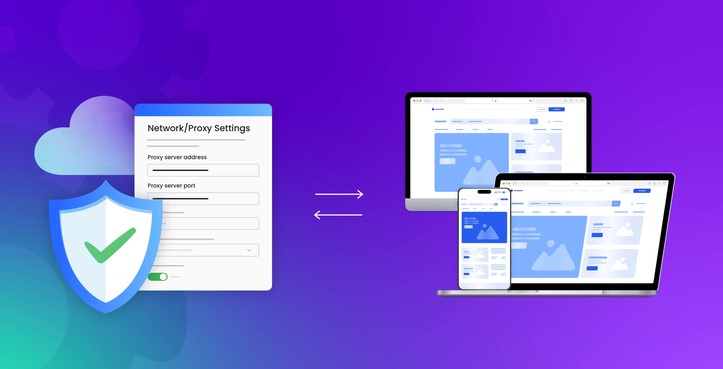
 Imagine running a high-stakes clinical trial demo at a major digital health conference. Your team spent months building a real-time patient telemetry dashboard, but the venue’s restrictive enterprise Wi-Fi blocks your app’s backend API endpoints, throwing endless connection timeout errors in front of potential investors.
Over my past 10+ years architecting tech stacks and securing connected health hardware, I’ve seen this exact nightmare play out dozens of times.
The fix wasn’t rewriting thousands of lines of code or begging the venue network administrator for special access. The solution was setting up a proper proxy server configuration in under five minutes to bypass network filters, route requests safely, and encrypt outbound data traffic seamlessly.
Whether you want to protect sensitive user data, manage corporate network traffic, or scrape web data without getting IP-banned, mastering proxy configuration is one of the most practical skills you can learn in modern networking.
What Is a Proxy Server? (The Airport Courier Analogy)
Before diving into configuration files and IP settings, let’s demystify what a proxy actually does.
+-----------------------------------------------------------------------+
|                     TRADITIONAL VS. PROXY ROUTING                     |
+-----------------------------------------------------------------------+
| Direct:  [ Your Device ] =======================> [ Destination Web ] |
|                                                                       |
| Proxy:   [ Your Device ] ---> [ Proxy Server ] ---> [ Destination Web ] |
|                               (IP Masked &    |                       |
|                                Filtered Here) |                       |
+-----------------------------------------------------------------------+
When you browse the internet normally, your device talks directly to the target server. The server sees your exact IP address, your location, and your device details.
A proxy server sits directly between your device (client) and the internet (destination server). It acts as an intermediary, receiving your request, forwarding it to the web on your behalf, gathering the response, and sending it back to you.
Analogy: Think of a proxy server like a personal assistant at an airport courier desk. Instead of walking into a secure facility yourself to deliver a sealed envelope, you hand the envelope to your assistant. The assistant walks in, delivers it using their own security badge, picks up the reply, and hands it back to you. The facility only ever sees the assistant—your personal identity remains completely hidden behind the desk.
Core Types of Proxy Configurations You Should Know
Not all proxies serve the same purpose. Depending on whether you are managing incoming web traffic or outgoing user requests, you’ll interact with different architecture styles:
1. Forward Proxy (The Client Shield)
A forward proxy sits in front of clients (like your office laptops or mobile devices). It inspects and routes outgoing traffic before it reaches the broader internet. Companies commonly use forward proxies to filter malicious websites, log employee internet usage, or enforce corporate security policies.
2. Reverse Proxy (The Server Guardian)
A reverse proxy sits in front of web servers. When a user sends a request to a website, the reverse proxy receives it first, handles tasks like SSL/TLS termination, load balancing across multiple servers, and caching static content. Popular web servers like NGINX and HAProxy are most commonly deployed as reverse proxies.
3. Transparent vs. Anonymous vs. High Anonymity (Elite) Proxies
-
Transparent Proxy: Passes your IP address along in HTTP headers (
X-Forwarded-For). Used mostly for content caching in schools or public Wi-Fi networks, not for privacy. -
Anonymous Proxy: Hides your real IP address, but identifies itself to the target server as a proxy.
-
High Anonymity (Elite) Proxy: Hides your IP address and masks the fact that it is a proxy at all, making traffic look like standard residential browsing.
Step-by-Step: Basic Proxy Server Configuration
Setting up a proxy doesn’t require a master’s degree in network engineering. Here is how proxy server configuration works across standard environments.
Setting Up a Proxy on Windows 11 / macOS (System Level)
For everyday browsing or routing all application traffic through an intermediary:
-
Open your OS settings (Settings > Network & Internet > Proxy on Windows, or System Settings > Network > Proxies on macOS).
-
Toggle Use a proxy server to On.
-
Enter the IP Address (e.g.,
192.168.1.50) and the Port Number (commonly8080,3128, or1080). -
Enter authentication credentials (Username and Password) if required by your proxy provider.
-
Click Save. All system HTTP/HTTPS requests will now route through your proxy.
Setting Up a Quick NGINX Reverse Proxy (Linux Server)
If you are hosting a web app or API service and want to configure a reverse proxy using NGINX, here is a clean, minimal server block configuration:
Nginx
server {
    listen 80;
    server_name myhealthapp.com;

    location / {
        # Forward requests to your internal backend application running on port 5000
        proxy_pass http://127.0.0.1:5000;

        # Preserve original client headers for logging and security
        proxy_set_header Host $host;
        proxy_set_header X-Real-IP $remote_addr;
        proxy_set_header X-Forwarded-For $proxy_add_x_forwarded_for;
        proxy_set_header X-Forwarded-Proto $scheme;
    }
}
This configuration tells NGINX to listen for incoming web requests on port 80 and pass them directly to an internal application running on port 5000, masking your internal app architecture from public view.
Pro Tips & Hidden Pitfalls: A 10-Year Hardware & Software Tech Veteran’s Perspective
Having built systems handling millions of API calls across health networks and cloud infrastructure, I’ve hit almost every configuration trap possible. Here are the practical realities marketing guides skip.
Pro Tips for Optimal Configuration
-
Always Enable SSL/TLS Termination at the Proxy: Let your reverse proxy handle SSL certificate decryption (via Let’s Encrypt or Certbot). This offloads heavy cryptographic processing from your backend applications, freeing up CPU power for core logic.
-
Set Explicit Connection Timeouts: Always configure
proxy_read_timeoutandproxy_connect_timeoutparameters. Without explicit timeouts, hanging client connections can exhaust your server’s available thread pool during traffic surges. -
Leverage PAC Files for Enterprise Teams: Don’t manually configure IP settings on 50 team laptops. Use a Proxy Auto-Configuration (PAC) file hosted on a central server so devices automatically route traffic based on URL patterns.
Hidden Pitfalls to Avoid
-
The “Open Proxy” Security Nightmare: If you set up a forward proxy on a public IP without authentication or strict IP whitelisting, malicious actors will scan and hijack your server within hours, using it to launch DDoS attacks or route illegal traffic under your IP.
-
Broken IP Logging: When placing a reverse proxy in front of your app, your server logs will suddenly show every single user coming from
127.0.0.1(the proxy’s IP). Always ensure your application reads theX-Forwarded-Forheader to capture actual client IP addresses for security auditing. -
Ignoring DNS Leakage: A proxy may reroute your HTTP traffic while leaving your DNS queries unencrypted across your default ISP network. Use SOCKS5 proxies or enforce DNS-over-HTTPS (DoH) to prevent identity leaks.
The Road Ahead: Smart Proxies and Zero-Trust Networks
Looking forward, traditional static proxy setups are evolving into dynamic, software-defined perimeters.
+---------------------------------------------------------------+
|               THE FUTURE OF NETWORK ACCESS                    |
+---------------------------------------------------------------+
| Legacy Setup      --> Static IP Whitelisting & Basic Proxies  |
| Modern Evolution  --> Zero-Trust Network Access (ZTNA)        |
| AI Integration    --> Real-time Anomaly Filtering & Auto-Bans |
+---------------------------------------------------------------+
We are transitioning toward Zero-Trust Network Access (ZTNA) systems, where dynamic proxies evaluate device health, user credentials, and location biometrics in real time before granting access to single API endpoints. Combined with automated IP rotation and AI-driven threat detection, managing proxies is fast becoming an automated, continuous security process rather than a manual configuration task.
Final Thoughts
Mastering proxy server configuration isn’t just about hiding IP addresses or unblocking restricted websites—it’s a foundational skill for building secure, scalable, and resilient network architectures. Whether you’re deploying an NGINX reverse proxy for a web service or configuring forward proxies across a remote workforce, taking the time to set up proper headers, timeouts, and authentication pays off in long-term reliability.
Over to You: Are you setting up a forward proxy for privacy/scraping, or a reverse proxy for hosting web applications? What network bottleneck or error code is currently giving you headaches? Drop your questions in the comments below, and let’s troubleshoot it together!